

AWS SNS Configuration
Before you configure push notifications, follow the prerequisites below:- Create an SNS Platform Application using AWS Management console and note it’s ARN.
- Create an AWS Access Key ID authorized to create Platform Application endpoints. Guardian automatically creates a Platform Application endpoint with an appropriate device token as part of a successful enrollment.
Configure push notifications with AWS SNS
To receive push notifications from Guardian, you first need to override Guardian’s default SNS settings. Then, you can configure push notifications for Android and iOS.- On the Auth0 Dashboard, navigate to Security > Multi-factor Auth and select Push via Auth0 Guardian. If the method is inactive, select the toggle at the top right to enable it.
- Select Custom to reveal additional settings.
- In the Push Notification Service section, choose Amazon SNS.
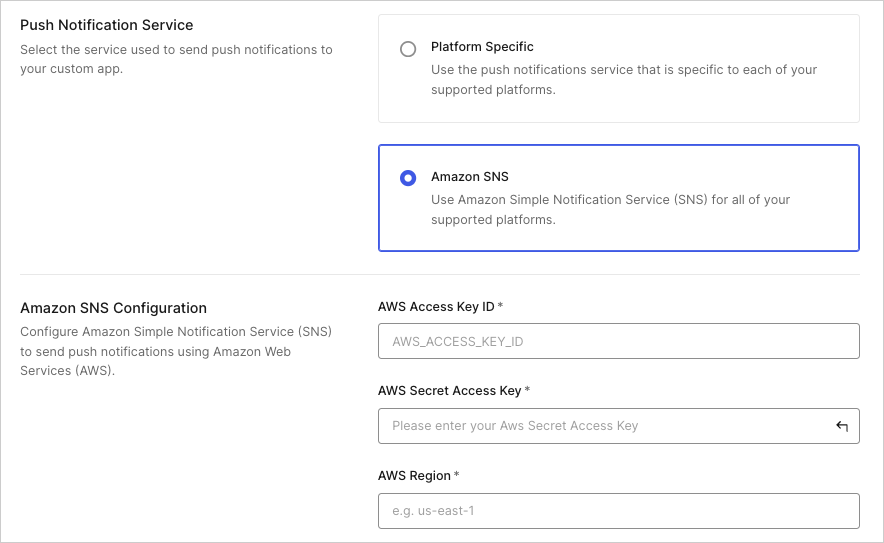
-
In the Amazon SNS Configuration section, complete the following fields:
- Select Save to complete your changes.
Configure push notifications for Android using FCM
- Get FCM credentials
- Configure Auth0 Dashboard
To configure Android push notifications on your Auth0 Dashboard, first retrieve your FCM server credentials. For full details, review Google’s Firebase documentation.
- Navigate to the Firebase Console and select your applicable project.
- Open the Settings menu and choose Service Accounts.
- Select Generate New Private Key to download your credential file.
Configure push notifications for iOS using APNs
- Get and convert APN certificate
- Configure Auth0 Dashboard
To configure iOS push notifications on your Auth0 Dashboard, first retrieve your APN certificate and convert it to modern encryption.Keychain Access exports P12 files with legacy encryption (RC2 and Triple DES). Auth0 doesn’t accept P12 files with legacy encryption, so you must convert the file to modern encryption (AES-256-CBC) before you upload it. You need OpenSSL 3.0 or later to convert the file. The
openssl command included with macOS is LibreSSL, which doesn’t support the options that the following steps use. On macOS, you can install OpenSSL with Homebrew:- Generate a new APN certificate from your Apple developer account. Choose the Apple Push Notification service SSL (Sandbox & Production) type. For development and testing only, you can choose Apple Push Notification service SSL (Sandbox) instead.
- Install the certificate locally.
-
Find the certificate in Keychain Access. Its name depends on the certificate type:
- Apple Push Notification service SSL (Sandbox & Production):
Apple Push Services: {AppId} - Apple Push Notification service SSL (Sandbox):
Apple Sandbox Push Services: {AppId}
- Apple Push Notification service SSL (Sandbox & Production):
-
Export the certificate and the associated private key to a P12 file (default name:
Certificates.p12). When Keychain Access asks for a password to protect the exported items, leave the password empty. -
Convert
Certificates.p12to modern encryption. In a terminal, go to the folder that contains the file, and run the following commands:-
Set the
OPENSSLshell variable to theopensslcommand that Homebrew installed, so that the following commands don’t use LibreSSL. If you installed OpenSSL 3.0 or later without Homebrew, use the full path to itsopensslbinary instead.The$OPENSSL versioncommand shows your OpenSSL version. The output must show OpenSSL 3.0 or later, not LibreSSL. -
Extract the certificate and the private key to an intermediate
apns.pemfile. OpenSSL needs the-legacyoption to read the legacy encryption. -
Create an
apns.p12file with modern encryption and no password. The new file uses Password-Based Encryption Scheme 2 (PBES2) with AES-256-CBC and a SHA-256 message authentication code (MAC). -
Delete
apns.pem, because it contains your unencrypted private key:
-
Set the
-
Before you upload
apns.p12, check its encryption. Run the following command in the same terminal session, so that theOPENSSLvariable is still set:Check the following three lines in the output:- The
MACline showssha256. - The
PKCS7 Encrypted dataline, for the certificate, showsPBES2, PBKDF2, AES-256-CBC. - The
Shrouded Keybagline, for the private key, showsPBES2, PBKDF2, AES-256-CBC.
- The
-
Delete
Certificates.p12, and useapns.p12as the APN certificate in the Auth0 Dashboard. To upload the certificate with the Auth0 Management API instead, encodeapns.p12in base64:Use the output as thep12value when you call the Update APNS Configuration endpoint. This endpoint overwrites the whole APNs configuration, so also include thebundle_idandsandboxvalues. To get the current values, call the Get APNS Push Notification Configuration endpoint.